By Andrew Psarris
Sending in prescreening recordings for music auditions and jobs is now a common practice, but if you have very little experience with audio and video recording, creating your own performance video can present enormous challenges. You may be among the best at playing your instrument, or a terrific singer, but a good or poor audition video can mean the difference between getting to the next round or giving up in defeat!
Luckily, there is plenty of good information available online about the best and most appropriate equipment, and the steps necessary in preparing an audition video. After checking much of this information out, I’ve put together a list of steps, along with comments and explanations, which should help you out.
QUICK GUIDE TO MAKING A RECORDING:
1. Decide on a budget
2. Follow the rules for that specific recording
3. Find a suitable location
4. Pick your equipment
5. Setup equipment in the location
6. Have someone in the room and do a mock recording
7. Record and Review
8. Use you software to briefly edit
9. Send it in.
STEP 1: DECIDE ON A BUDGET

The first and most crucial thing to decide on is how much you want to spend on these recordings. There are many options. The first and most expensive option is to hire a professional sound engineer. This will usually set you back more than $1000 but you won’t have to deal with the technical details of putting together a great recording. If you buy microphones and an adapter to plug into your computer you will usually spend between 200 and many thousands of dollars—depending on the equipment. Video equipment that simultaneously records will set you back between 230-500 dollars. The last great option is to buy a recording device. This will set you back between 70-500 dollars depending on the recorder. All of these options produce excellent recordings…if you know what you’re doing; it’s just a matter of how much you’re willing to spend.
Every school has its own rules for sending in recordings—it is your job to know what they are. Whether it be markings on the recording, stating your piece before you play, time requirements or restrictions on editing you must follow the rules or the committee may very well not consider your recording.
STEP 3: LOCATION, LOCATION, LOCATION
Location is key for a recording. You want a large enough room so that you can put a microphone where someone would be sitting if this were a recital. A small rehearsal space or large living room would be fine. Preferably you want a room with high ceilings and not too many reflexive and hard surfaces. These surfaces will create an echo effect called slapback, making the recordings hard to listen to. If the room is full of hard surfaces, put a carpet on the ground or curtains on the wall to soak up some of the sound—this is especially true if you play a brass instrument.
In everyday life, we forget how much noise is around us; try and choose a room that will minimize these effects. Some of these unrecognized noises are, wind, plumbing, air-conditioning, neighbors, cars, refrigerator, and birds.
For video recordings:
You want a nice, clean room; do not record in a cluttered room. Lighting is also a key component to video recording. Natural light is best. If you have no natural light you want to position the light so that it shines toward you from behind or to the side of the camera. You do not want to have light shining in back of you—do not record in front of a window.
Dress the part. Always dress well in video recordings.
STEP 4: PICK YOUR EQUIPMENT

I found this to be the hardest part of putting together a recording because in your search you can easily be led down the Google rabbit hole, and with all the possible choices, never get a good grasp on what you need. Below, I have made it simple: limiting each category to four or five options with prices to compare.
Avoid “gimmicky” sounding equipment. The best product for you is a simple, well-designed product that gets the job done. Purchasing used equipment or renting devices such as microphones, video or audio recorders can be a great way to save money.
Recorders-sound only [between $60 and $230 new]:
IPhone/iPod with a TASCAM iM2 microphone attachment-$60 for mics
-Quite literally a microphone that you plug into your IPhone
Zoom H1 Handy Portable Digital Recorder
-This is a simple recorder that a good starter for anyone looking to record
Zoom H2/H2n
-Ability to plug in external microphones
Zoom H4/H4n
-High-end version of the H2
-XLR input jacks to connect external microphones
-Can be paired with a DSLR camera to create a simultaneous sound and video recording.
Roland R-05
-Good all around recorder
-Garnered a lot of praise from users
Sony PCM-M10
-Compact recorder
-External Mic hook-up
Video/Sound Recorders [$200-$400 new]:

Zoom H4
-I put this on here again because you can easily hook it up to a camera and record audio while simultaneously recording video.
https://www.zoom-na.com/products/field-video-recording/field-recording/zoom-h4n-handy-recorder
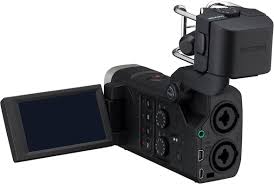
Zoom Q4n
https://zoom-na.com/products/field-video-recording/video-recording/zoom-q4n-handy-video-recorder
Zoom Q8N
https://www.zoom-na.com/products/field-video-recording/video-recording/zoom-q8
Olympus LS-20M HD
https://www.guitarcenter.com/Olympus/LS-20M-HD-Video-Audio-Recorder.gc
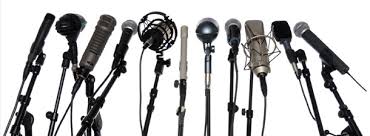
External Microphones [$70-$400 new]:

Giant Squid Audio Lab-Omnidirectional Stereo Microphone-
-Inexpensive
-Upgrade to built in microphones in recorders
Shure Beta 58
-Excellent mic for vocal music
Audio-Technica AT4040 Cardioid Condenser Microphone
-Very sensitive microphone-it will capture the hum of speakers or air-conditioning
Rode NT3
-Excellent for percussion, drums, and guitar
Shure KSM 141/SL Dual-pattern End-Address Condenser Microphone
-You’ll need two to record in stereo, but these create top-notch recordings!
Additionally you will need a mic stand, a mic cable, and a converter that can convert the sound from the microphone into something that can be plugged into a computer (unless the microphone can do that already). I recommend: Blue Microphone Icicle XLR to USB mic converter: http://www.amazon.com/gp/product/B001EW5YQS/ref=as_li_tl?ie=UTF8&camp=1789&creative=9325&creativeASIN=B001EW5YQS&linkCode=as2&tag=robknoppercom-20&linkId=LALCNXEDT5FLPYPS
First: You want to record in stereo sound. This is how we naturally hear. All the recorders on this list have stereo settings; make sure you switch it before you hit record. The link below explains how to record in stereo sound:
http://ehomerecordingstudio.com/stereo-microphone-techniques/
Second: Optimum mic position will depend on the space of the room and the instruments being recorded. A general rule of thumb is to position the mic so that if you were giving a small recital the mic would be about where the first or second row of people would be. It should be eight feet off the floor, six feet in front of the player pointed directly at the instrument. Also, listen to how the room affects the sound. Strike a balance between where the sound is coming from and what the room is doing to the sound once it is made.
Third (for video recordings): Frame the shot so that you are positioned in the center of the video. This is a lot easier with someone in the room helping you.
STEP 6: HAVE SOMEONE IN THE ROOM/MOCK RECORDING
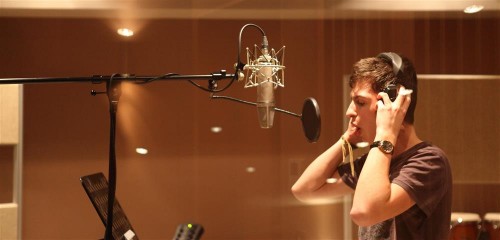
Always have a friend, peer, or teacher in the room with you. They can adjust levels, give feedback about the room, give you confidence and support, and help with the recording setup. The recording process is made easier when you have someone else there who can provide valuable assistance.
Similarly, do a mock recording to make sure everything is working well. After you’re finished, have a friend listen to it; ask him or her about the sound levels, and the recording quality.
STEP 7: RECORD AND REVIEW
It is extremely important that you review all the recordings when you are finished making them, to make sure it is your best work possible. Remember—as this isn’t live, it is important to send in something that is as good as you can possibly make it!
STEP 8: EDITING AND SOFTWARE
There are many types of recording software packages that you can buy such as pro tools, but free software such as, Garageband, audacity or imovie for video recordings provides the biggest bang for your buck. It allows you to record right to the software so that manipulation is easy.
Editing is usually pretty easy in this case because we are not mastering or splicing recordings. Most schools and professional orchestras will have strict guidelines when it comes to splicing or mastering the recording for an audition.
The three types of editing you might need to do are:
1. Convert you file to an MP3 or other specified format
2. Put all the recordings together in one continuous stream with small pauses
3. Sync video and audio together so that that what you see is in line with what you hear
For all of these types of editing, specific, simple tutorial videos taught by masters can be found for free on YouTube—this is the best place to get this information.
Many schools have specific rules on how to submit a recording — follow them!
Examples: upload as a YouTube video, send in as a CD, or send as a zip file
I hope my nine steps on how to make a recording have given you some good information and assuaged your fears about the recording process. All it takes to make a great audition video is a little conscientious research, a little money wisely spent … and of course a lot of talent!
LINKS FOR FURTHER INFORMATION:
How to sync video and audio:

How to convert a video in MP3:

Videos about putting together a recording:


Basics for At-Home recording studio:
http://ehomerecordingstudio.com/home-recording-studio-essentials/
http://www.wikihow.com/Make-a-Cheap-Recording-Studio


